-
Intensity: Easy
-
Total Time: 5 hours 30 minutes
-
Prep Time: 30 minutes
-
Chill Time: 5 hours (minimum)
-
Servings: 8-10 slices
-
Yield: One 8-inch or 9-inch cheesecake
Why This Recipe Works
-
No-Bake Simplicity: As the name suggests, there’s no baking involved! A simple biscuit crust is pressed into the pan, and the filling is mixed on the stovetop and with a mixer.
-
Bright, Fresh Flavor: We use both fresh lemon zest and juice to ensure a vibrant, authentic lemon taste in every single bite. No artificial flavors here!
-
Perfectly Creamy Texture: A combination of full-fat cream cheese and a stabilized lemon curd creates a filling that is rich, creamy, and holds its shape beautifully when sliced.
-
Make-Ahead Friendly: This cheesecake needs at least 5 hours to set, making it the ideal dessert to prepare the day before your gathering. One less thing to worry about on the day!
Ingredients
For the Crust:
-
200g (7 oz) digestive biscuits (or graham crackers)
-
100g (½ cup) unsalted butter, melted
-
2 tablespoons granulated sugar
For the Lemon Filling:
-
500g (17.6 oz) full-fat cream cheese, softened to room temperature
-
100g (½ cup) granulated sugar
-
Zest of 2 large lemons (about 2 tablespoons)
-
Juice of 1.5 large lemons (about 4 tablespoons), freshly squeezed
-
300ml (1 ¼ cups) double cream (or heavy whipping cream), cold
-
1 teaspoon vanilla extract
For the Lemon Curd Topping (Optional, but Highly Recommended):
-
3 large egg yolks
-
100g (½ cup) granulated sugar
-
Zest of 1 lemon
-
Juice of 2 large lemons (about 6 tablespoons)
-
60g (¼ cup) unsalted butter, cut into small cubes
Equipment You’ll Need
-
8-inch or 9-inch springform pan (or a deep pie dish)
-
Food processor or a rolling pin and zip-top bag (for crushing biscuits)
-
Mixing bowls
-
Electric hand mixer or stand mixer
-
Saucepan (for lemon curd)
-
Fine-mesh strainer (optional, for lemon curd)
-
Spatula
-
Measuring cups and spoons
Instructions
Step 1: Make the Crust
-
Prepare the pan: Lightly grease the bottom and sides of your springform pan with a little butter or non-stick spray. This will make removing the slices easier later. If you’re concerned about sticking, you can also line the bottom with a circle of parchment paper.
-
Crush the biscuits: Place the digestive biscuits in a food processor and pulse until they become fine crumbs. Alternatively, place them in a sturdy zip-top bag, seal it (removing the air), and crush them with a rolling pin.
-
Combine with butter: Pour the biscuit crumbs into a medium bowl. Add the sugar and mix. Pour in the melted butter and stir with a fork until all the crumbs are evenly moistened. The mixture should look like wet sand and hold together when pressed.
-
Press into the pan: Transfer the crumb mixture to your prepared pan. Use the bottom of a flat glass or a measuring cup to firmly press the crumbs into an even layer on the bottom. For a neater look, you can also press the crumbs about an inch up the sides of the pan. Place the crust in the refrigerator to set while you prepare the filling.
Step 2: Make the No-Bake Lemon Filling
-
Whip the cream: In a large, clean bowl, add the cold double cream and vanilla extract. Using an electric hand mixer or a stand mixer with the whisk attachment, whip the cream until it forms stiff peaks. Be careful not to overwhip, or it will start to turn into butter. Set aside in the refrigerator.
-
Beat the cream cheese: In another large bowl, beat the softened cream cheese with the electric mixer until it is completely smooth and free of any lumps.
-
Add sugar and lemon: Add the granulated sugar to the cream cheese and beat until well combined and creamy. Add the lemon zest and lemon juice and mix again until fully incorporated. The mixture will thicken slightly.
-
Fold in the whipped cream: Remove the bowl of whipped cream from the fridge. Add a large spoonful of the whipped cream to the cream cheese mixture and gently fold it in with a spatula to loosen the mixture. Then, add the rest of the whipped cream and carefully fold it in using a figure-eight motion until no white streaks remain. The filling should be light, airy, and uniform in color.
Step 3: Assemble the Cheesecake
-
Add filling to crust: Remove the crust from the refrigerator. Spoon the lemon filling onto the chilled crust.
-
Spread evenly: Gently spread the filling into an even layer using a spatula or the back of a spoon. You can also tap the pan gently on the counter a few times to release any air bubbles.
-
Initial chill: Carefully place the cheesecake in the refrigerator to set for at least 4 hours, or preferably overnight. This is crucial for the structure.
Step 4: Make the Lemon Curd Topping (Optional)
-
Combine ingredients: While the cheesecake is setting, you can make the lemon curd. In a small, heatproof bowl (or the top of a double boiler), whisk together the egg yolks and sugar until pale and thick. Whisk in the lemon zest and lemon juice.
-
Cook gently: Place the bowl over a saucepan of gently simmering water (make sure the bottom of the bowl doesn’t touch the water). Cook, stirring constantly with a whisk or a silicone spatula, for about 5-10 minutes, until the mixture thickens enough to coat the back of a spoon.
-
Finish with butter: Remove the bowl from the heat. Add the cubed butter, one piece at a time, stirring until it is completely melted and the curd is smooth and glossy.
-
Strain (optional): For an extra-smooth curd, you can pour it through a fine-mesh strainer to remove the zest and any cooked egg bits.
-
Cool: Cover the surface of the curd directly with plastic wrap (to prevent a skin from forming) and let it cool to room temperature. It will continue to thicken as it cools.
Step 5: Final Assembly and Serving
-
Spread the curd: Once the cheesecake has fully set (after at least 4 hours) and the lemon curd is cool, gently spread the lemon curd over the top of the cheesecake.
-
Chill again: Return the cheesecake to the refrigerator for at least another 1 hour to allow the curd layer to set.
-
Serve: When ready to serve, carefully run a thin, sharp knife around the edge of the pan before releasing the springform clasp. Slice with a clean, sharp knife, wiping the blade clean between each cut for neat slices.
-
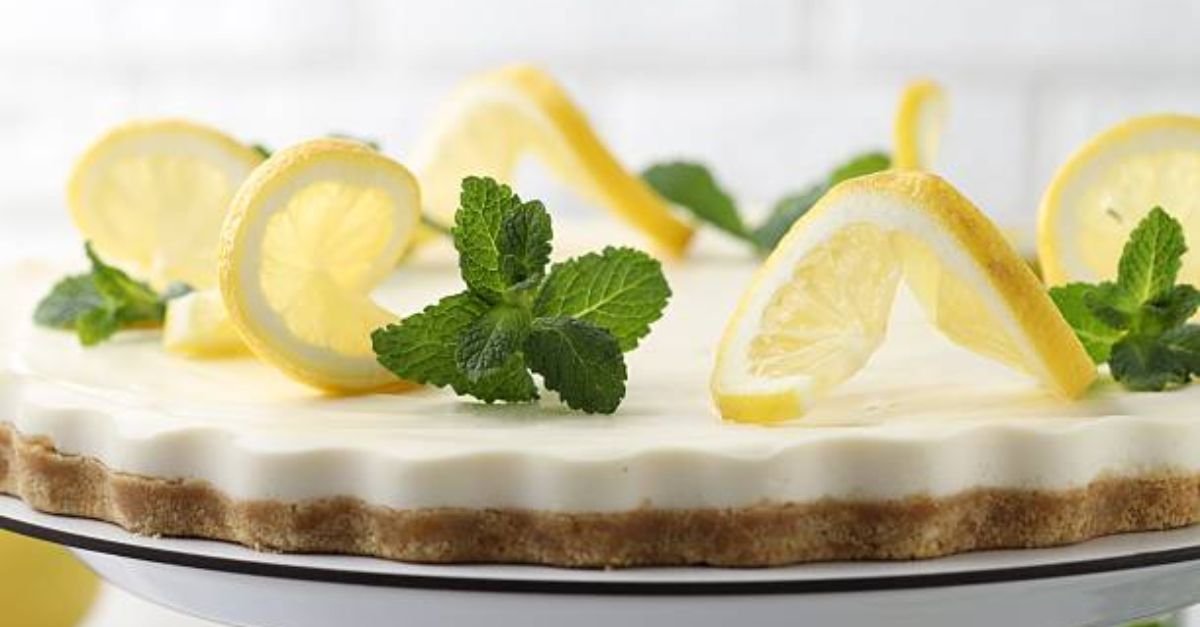
Garnish (optional): Garnish with fresh raspberries, blueberries, mint sprigs, or extra lemon zest for a beautiful presentation.
Recipe Notes & Tips for Success
-
Room Temperature Ingredients: It’s vital that your cream cheese is at room temperature before you begin. This ensures a smooth, lump-free filling. Cold cream cheese will result in a grainy texture.
-
Fresh Lemons are Key: Please use fresh lemon juice and zest for this recipe. Bottled lemon juice lacks the bright, complex flavor needed to make this dessert shine.
-
Patience is a Virtue: Don’t rush the chilling time. The cheesecake needs a solid 5+ hours to set properly. An overnight chill is always best for perfect, clean slices.
-
Storing Leftovers: Store any leftover cheesecake covered in the refrigerator for up to 4 days. This cheesecake is also fantastic for freezing (without the fresh fruit garnish). Wrap slices tightly in plastic wrap and foil and freeze for up to 2 months. Thaw overnight in the refrigerator before serving.
Nutrition Information
Disclaimer: Nutrition information is provided as an estimate and for informational purposes only. It is not a substitute for professional dietary advice. Values may vary depending on the specific ingredients and brands used.
Nutritional information is for the cheesecake including the lemon curd topping.
| Nutrient | Amount per Serving (based on 10 servings) |
|---|---|
| Calories | 542 kcal |
| Fat | 41 g |
| Saturated Fat | 25 g |
| Carbohydrates | 39 g |
| Sugars | 28 g |
| Protein | 7 g |
| Sodium | 262 mg |
| Fiber | <1 g |