Prep Time: 10 minutes
Cook Time: 50-55 minutes
Total Time: ~1 hour 5 minutes
Intensity Level: Easy – Perfect for beginners, bakers with little time, or anyone craving a spectacular dessert with minimal effort. This is a true “dump and bake” recipe.
A Note From Our Kitchen
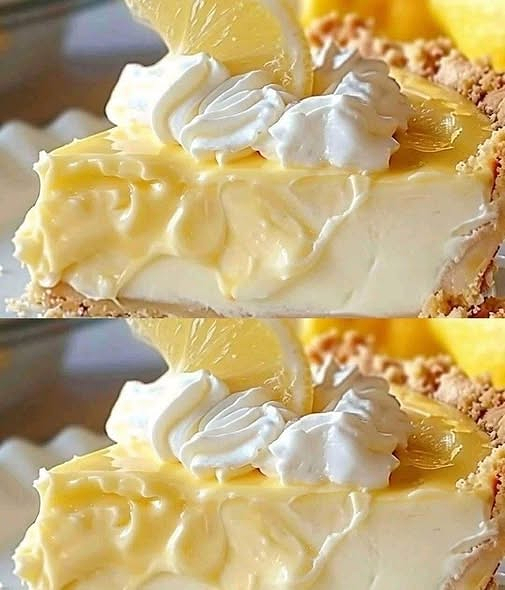
In the world of desserts, few things are as magically satisfying as a “dump cake.” The name isn’t glamorous, but the result is pure, unadulterated comfort. This Lemon Cream Cheese Dump Cake elevates the classic with a luscious, tangy cream cheese layer and a bright, sunny burst of lemon. It bakes into a marvelously textured dessert: a creamy, almost cheesecake-like middle, a gooey lemon layer, and a golden, crumbly cake topping that’s irresistible straight from the oven. It’s the perfect answer for potlucks, weeknight treats, or when you need a guaranteed crowd-pleaser without the fuss.
Ingredients
For the Cream Cheese Layer:
-
1 (8 oz) package full-fat cream cheese, softened to room temperature
-
1/3 cup (65g) granulated sugar
-
1 large egg, at room temperature
-
1 teaspoon pure vanilla extract
-
Zest of 1 lemon
For the Dump Cake:
-
1 (21 oz) can lemon pie filling OR 2 (12 oz) jars high-quality lemon curd
-
1 (15.25 oz) box classic yellow cake mix (do not use one with pudding in the mix)
-
1 cup (2 sticks / 226g) unsalted butter
-
1 medium lemon, thinly sliced (optional, for garnish)
-
Powdered sugar, for dusting (optional)
Equipment: 9×13 inch baking dish, hand mixer or whisk, microwave-safe bowl.
Instructions
Step 1: Prep & Preheat
Preheat your oven to 350°F (175°C). Grease your 9×13 inch baking dish lightly with butter or non-stick spray. No need to wait for the oven to fully preheat—let’s get building!
Step 2: Create the Cream Cheese Ribbon
In a medium bowl, combine the softened cream cheese and 1/3 cup sugar. Using a hand mixer on medium speed (or a vigorous whisk), beat for 1-2 minutes until smooth and creamy. Beat in the egg, vanilla extract, and lemon zest until just combined and uniform. Set this bowl aside.
Step 3: The First “Dump”
Spread the entire can of lemon pie filling or lemon curd evenly across the bottom of your prepared baking dish. This is your vibrant, tangy base layer.
Step 4: The Creamy Swirl
Dollop the cream cheese mixture in large spoonfuls over the lemon layer. Don’t worry about spreading it perfectly—use the back of a spoon or a knife to gently swirl it into the lemon filling, creating a beautiful marbled effect. A few gentle figure-eight motions will do the trick.
Step 5: The Topping & The Butter
Sprinkle the entire box of dry yellow cake mix evenly over the lemon and cream cheese layers. Do not stir. This is crucial—the dry mix will become the topping.
Now, take your sticks of butter. Slice them into very thin pats (about 1/8-inch thick). Arrange the butter pats as evenly as possible to cover almost the entire surface of the cake mix. This butter will melt in the oven, soaking into the cake mix and creating that iconic, crumbly, crisp topping.
Step 6: Bake to Perfection
Place the dish in the preheated oven on the center rack. Bake for 50-55 minutes. The cake is done when the topping is a deep, golden brown, the edges are bubbling vigorously, and the center is set (no large, wobbly areas). The aroma will be intoxicating—a buttery, lemony perfume.
Step 7: Cool & Serve
Remove the cake from the oven and place it on a wire cooling rack. Allow it to cool for at least 25-30 minutes before serving. This resting time is essential for the layers to set, making it easier to slice and serving it warm (not molten). If desired, garnish with thin lemon slices and a generous dusting of powdered sugar right before serving.
Serving & Storage
-
Serving Suggestion: This cake is sublime served warm, ideally with a scoop of vanilla bean ice cream or a dollop of freshly whipped cream. The contrast of cold cream and warm, gooey cake is heavenly.
-
Storage: Cover any leftovers tightly with plastic wrap or store in an airtight container in the refrigerator for up to 4 days. You can enjoy it cold or reheat individual portions in the microwave for 15-20 seconds.
The Last Scoop
The magic of this recipe lies in its beautiful imperfection and astounding ease. It’s a testament to the fact that the most memorable desserts often come from simple ingredients combined with joy, not stress. As it bakes, it creates its own layers and textures—a happy little kitchen miracle. It’s forgiving, it’s impressive, and it promises a taste of sunshine in every bite.
Nutrition Information
(Per serving, approximate, based on 12 servings)
| Nutrient | Amount |
|---|---|
| Calories | ~480 |
| Total Fat | 26g |
| – Saturated Fat | 15g |
| Cholesterol | 85mg |
| Sodium | 380mg |
| Total Carbohydrate | 58g |
| – Dietary Fiber | 0.5g |
| – Sugars | 38g |
| Protein | 4g |
Note: Nutritional information is an estimate provided by an online calculator and will vary based on specific ingredient brands and measurements used. For precise dietary needs, calculate using your exact products.